AWS-Logo_White-Color
1.
Introduction
1.1
Flow explaination
2.
Preparation Steps
2.1
Clone Code from GitHub
2.2
Create S3 Bucket
2.3
Create IAM EC2 Role
2.4
Create VPC
2.5
Create Subnets
2.6
Create Internet Gateway
2.7
Create NAT Gateway
2.8
Create Route Table
2.9
Create Security Group
3.
Create Database with RDS
3.1
Create database subnet group
3.2
Create database instance
4.
Deploy Application Tier
4.1
Create EC2 Server
4.2
Connect to EC2 instance
4.3
Download MySQL on EC2 instance
4.4
Run App on EC2 instance
5.
Create Internal Load Balancer and Auto Scaling Group
5.1
Create AMI for App Tier
5.2
Create Target group for App Tier
5.3
Create Internal Load Balancer
5.4
Create Launch Template
5.5
Create Auto Scaling Group
6.
Deploy Web Tier
6.1
Update Nginx Configuration File
6.2
Upload Application Source Code to Amazon S3
6.3
Create EC2 instance
6.4
Connect to EC2 instance
7.
Create External Load Balancer and Auto Scaling Group
7.1
Create AMI for Web Tier
7.2
Create Target group for Web Tier
7.3
Create External Load Balancer
7.4
Create Launch Template
7.5
Create Auto Scaling Group
8.
Demo deploy successfully
9.
Clean Up Resources
More
AWS Study Group - Blog
AWS Study Group - FB Group
English
Tiếng Việt
Clear History
Workshop
Cloud Journey
Last Updated
26-11-2023
Team
Gia Hưng
Edit this page
Deploy fullstack app with three-tier architecture
>
Create External Load Balancer and Auto Scaling Group
> Create AMI for Web Tier
Create AMI for Web Tier
Create AMI from EC2 Instance
Access EC2 service:
Choose
Instances
from the sidebar
Select instance
My Web Server 1
Click
Actions
, then click
Image and template
and choose
Create image
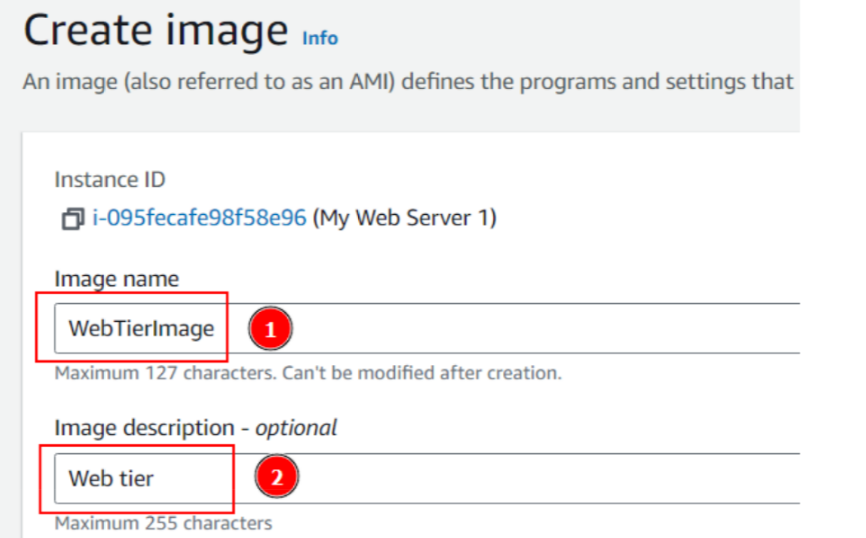
In the create image interface:
Fill in
Image name
with
WebTierImage
Fill in
Image description
with
Web tier
Scroll down to the bottom and click
Create image